 Often times you want to share a message or inform something to your visitors.
You can use plugins like message bars or notification bars to display such announcements. One such plugin is Announcer.
In this article, I’ll share some tips to enhance your notification bar so that you can convey the message in a better way.
If you are new to message bars, you can learn more about how to display the announcement bar in WordPress to get started.
1. Add Call-To-Action Buttons
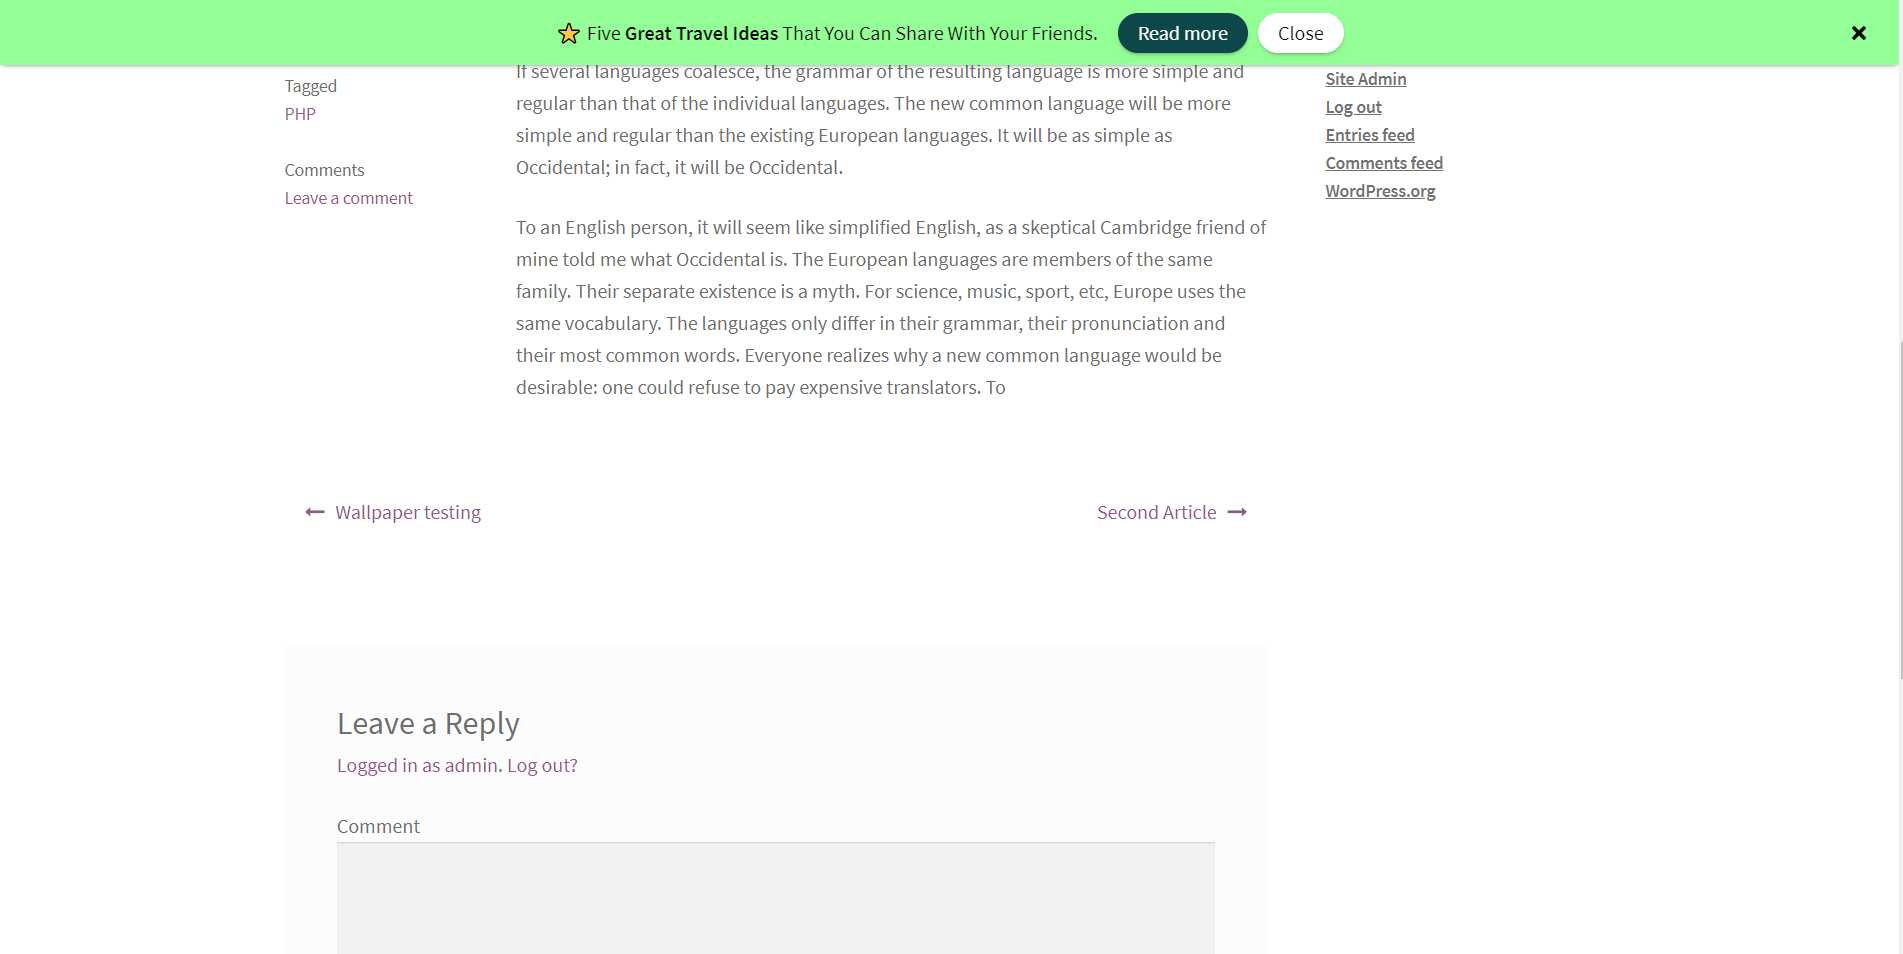
Adding a notification bar with a message is very easy. Most times we want visitors to act on the message like taking them to the shop, taking to the recent blog post, contact form, etc.
The simplest way to do this using buttons.
With the Announcer WordPress plugin, you can add multiple CTA (Call-To-Action) buttons to the notification bar.
Visitors can read your message and click on the button next to it. This increases the interactivity on your website and drives more sales and contacts.
2. Display a Random Message
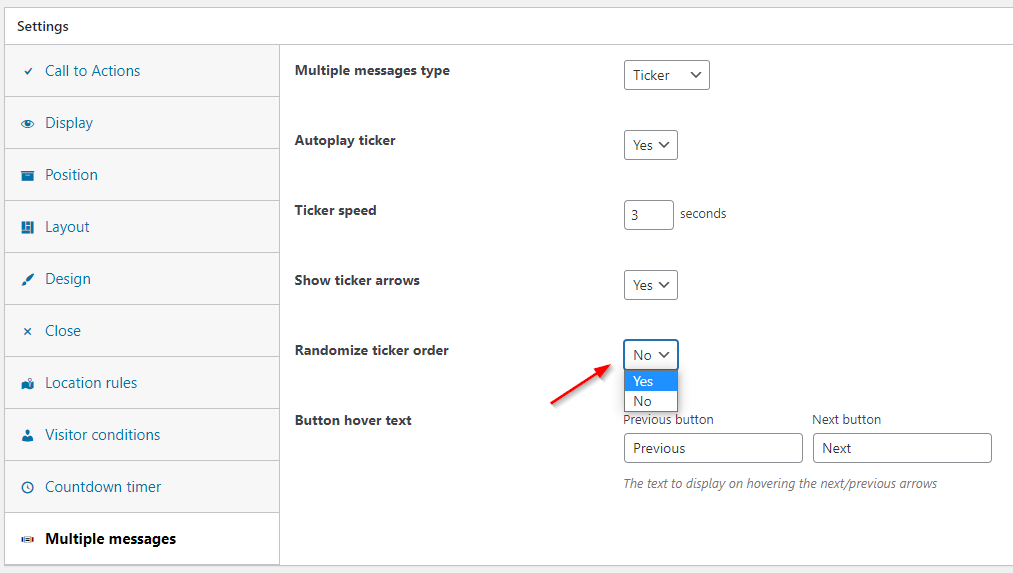
Do you know in Announcer PRO you can display a random message/announcement every time a user sees the page?
Yes, using this feature you can share a different announcement. This helps you effectively share the message, increases click on the announcement and gets the eyeballs.
- Simply install Announce PRO plugin
- Click “Add another message” instead of multiple messages in one announcement
- Switch to the “Multiple messages” tab and select “random” as the value for “Type”
3. Target Specific Visitors
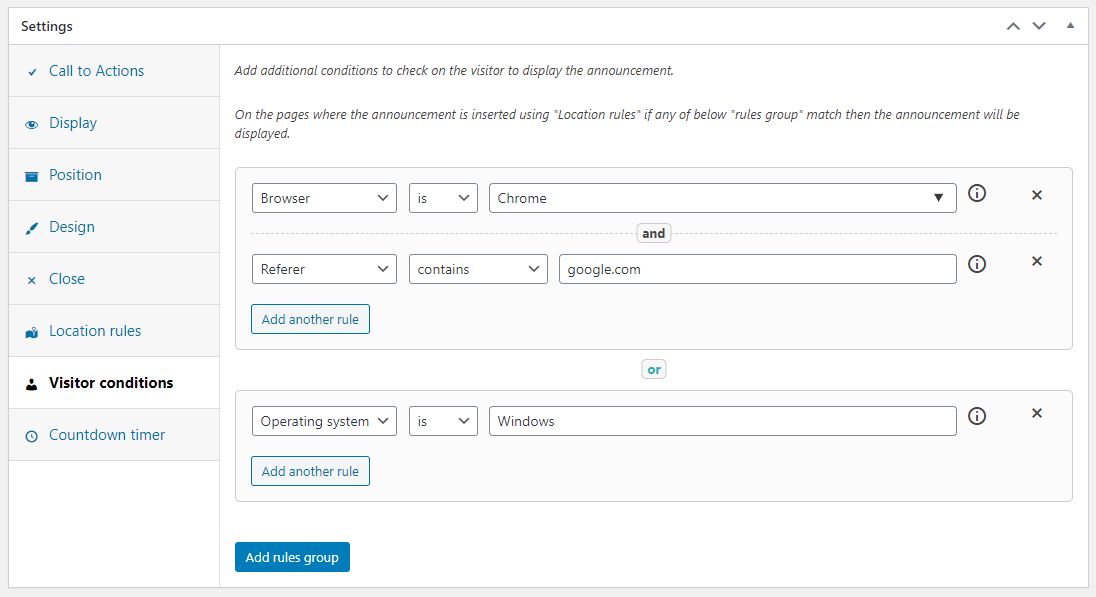
Let’s say you want to display an announcement based on the visitor’s operating system or the query parameters present in the URL you can do that with the Announcer PRO plugin.
Consider one more scenario where you need to show a “welcome message” when someone visits your site after a Google search.
You can do all this with the feature called “Visitor conditions” available in Announcer. Yes, you can build your own rules.
- Switch to the “Visitor conditions” tab of the plugin
- Click “Add rules group”.
- Select a rule example “Referrer” and set a value “google”
- Save the settings.
Now, this announcement will be displayed only when someone visits the site after clicking on a Google search result.
You can learn more about the supported rules and more in the announcer documentation.
4. Add Animation
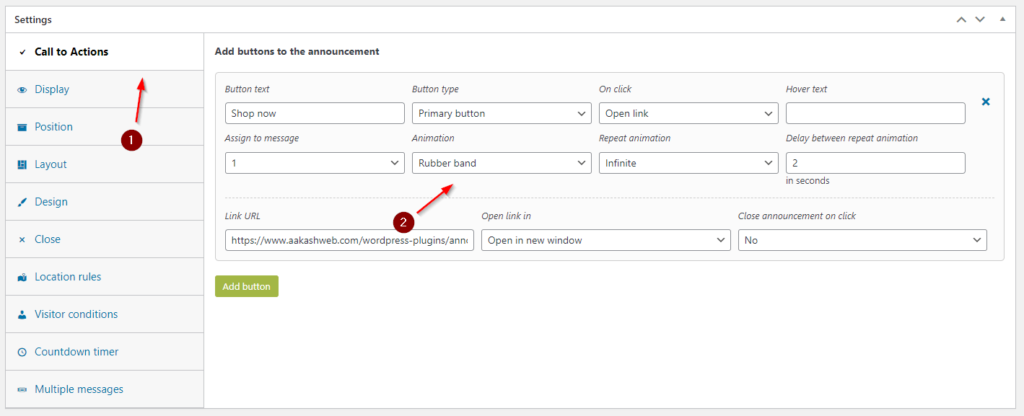
My 4th tip is to add animation to your announcement bar.
As you can see in this article, the main objective is to grasp the attention of your audience as much as possible.
A static announcement bar might not help always.
What if you can add an entrance animation? Or a looping heartbeat animation to the Call-To-Action buttons?
When you add animation, it instantly grabs the visitor’s eye.
Get started with adding animation with the Announcer plugin. You can learn more about this feature in the docs.
5. Schedule your Announcements
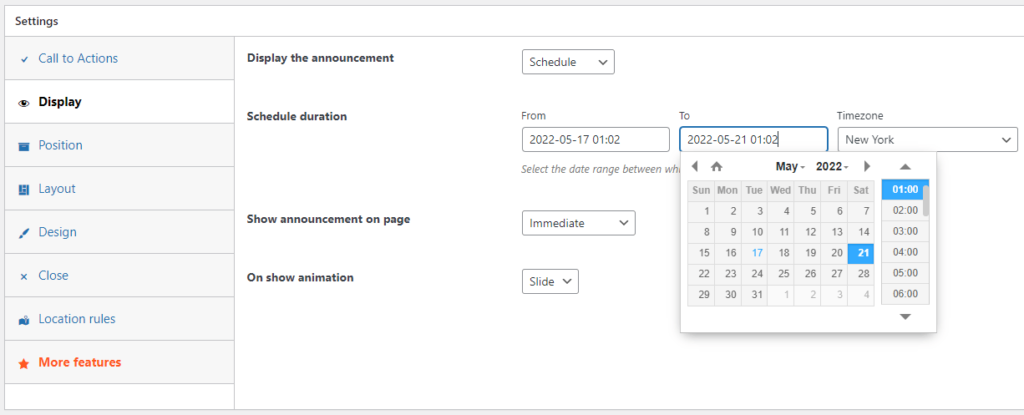
My last tip is to display the notification bars only during a certain time period.
This is effective during seasonal sale periods like Black Friday or Christmas.
You don’t need to add the announcements a day before. You can schedule them and let them display them occasionally.
In the announcer plugin, you can even schedule to show within a time range. This is useful for various occasions.
This feature is available even in the free version of the Announcer plugin.
Conclusion
The main reason for adding notification bars is to share announcements. In this article, I took the Announcer plugin and shared with you some tips and features which you can leverage.
I hope this article helped you give some idea of what can be done to spice up your notification bar or message bars.
If you have any comments please share them in the comments box below.
